Tuesday, November 29, 2011

Patching Away on The Thin Wood of A New Day

I've been working away at the patching. I've worked my way all the way across the belt course and down the corner board on the west end of the side. As I should have anticipated, I found a lot of little problems with the corner board. The biggest of these is that the earlywood is all worn away, leaving the board heavily grooved all the way along it. This means I pretty much have to skim-coat the entire board with putty. And of course, there are the usual nail holes and divots to fill in.

Another problem is that the corner board mounted perpendicularly to the one I'm patching, facing west on the front of the house, has been pulled away from the wall by the weight of the gutter downspout. I was able to fix this with a few well-placed screws in the front corner board.


This pulled the board back into place, and closed the gap between it and the corner board I am patching,


Since taking this picture, I've made a patching pass all the way down the board. Man, it was great to be working on solid ground for the first time in a while.

The bottom of the board is cracked, because as part of the distortion of the frame from the foundation sag, a half-inch gap opened up between it and the wall. Someone tried nailing in a massive framing nail to correct this, which caused the crack. Here I'm doing a dry test run with the clamp to make sure everything will line up correctly:


As you can see, everything lined up pretty well, so I epoxied everything up and then patched it. Tomorrow, I'll stick a shim between the board and the wall so I can screw it down properly.

Meanwhile, way back up on the belt course, I noticed a problem with a spot I had already patched:


I deserved this, because I didn't take the time to fix it properly in the first place. When patching butt joints seamlessly, one should always drill holes in both pieces and soak the wood with LiquidWood before patching. That way, when the epoxy cures the two pieces are locked together, becoming as a practical matter one piece. Apparently all the carpentry work I did on this trim run caused stress on this joint and pulled it apart. Thus, I have gone back and re-done this joint properly, drilling holes all around, injecting LiquidWood in them, and then patching up the cracks with WoodEpox.

A few more patching runs and I'll be done with the belt course and corner board. Then, I will patch up the trim between the siding and the foundation blocks (I forget what the proper term is for that trim course right now), and then I'll be more or less ready for the final priming and painting. That'll be my Christmas present to myself.

* * *

"Shouldn't there be a big pointy tree with lots of prey on it here by now?"

Friday, November 25, 2011

The Farm House Effect: Restoring A Phone

The patching of the belt course continues apace. Sadly, that activity isn't any more interesting now than it was in the last post, and we all know how that went. So, in order to slake the unquenchable thirst of my Brobdingnagian audience for new posts on this Thanksgiving weekend, I thought I'd take a little side trip in our tales of restoration.

You will recall my discussing the Farm House Effect: the extension of one's historical purview to encompass the lifetime of the old home he is restoring. This has made itself most apparent to Wifey and me in our fascination with the history of everyday things one takes for granted, such as phones.

During the excruciatingly long gestation period of the Farm House restoration plan, I was becoming increasingly antsy to be doing something, anything, to get ready for our coming life in our new old home. During this time, our friends Nik and Jo moved into their own fine old vernacular Craftsman home, "Tara", a scant half-mile away from the Farm House. In the experiencing of their own "Tara Effect", they purchased a restored old Western Electric Imperial 202 phone. This was a model Western Electric produced in the early Fifties to commemorate its 75th anniversary, a  revamped Model 202 with a gold-plated body and an ivory-painted handset. 

Not Nik and Jo's phone, but one much like it.

Nik and Jo chose it because they wanted to have a phone that contributed to the period feel they were working to achieve for their home.

It's a lovely phone, and Nik and Jo's idea struck Wifey and me as a brilliant one. The phone especially fired my imagination because my grandparents had a black 202 in their home when I was a boy. I was always fascinated by that phone, with its graceful lines, pretty porcelain number plate, huge handset, and the dial that purred like a mechanical cat when someone spun it. I loved the big resonant click that came out when one operated the switchhook, and the loud, clear ring of the bellbox on the wall.

My grandparents' 202 looked like this, but it was in better shape and had a coiled rubber cord.

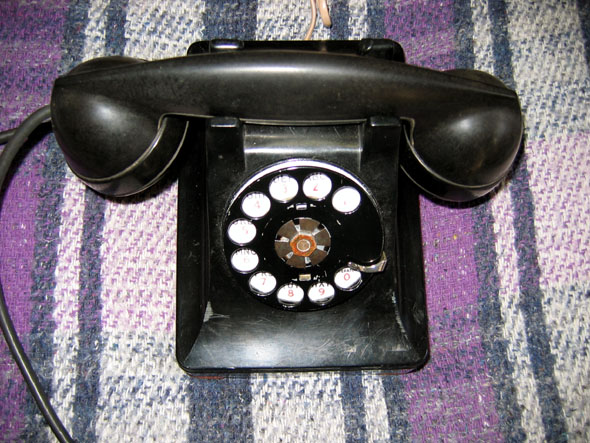
Compared to this magnificent machine, our plain old WE 500 at home was ugly and boring, the Organization Man of telephones.

A WE 500 in the Farm House study just like the one we had at home when I was a little boy.

It was from this comparison between the prehistoric (which in my early years meant "more than ten years old") 202 and the contemporary 500 that I first got the idea that old things were more grand, more beautiful, just plain better than new things.

So we adopted Nik and Jo's idea, and kinda went hog-wild with it. We decided to get a bunch of old phones from different eras and deploy them throughout the Farm House. We would hardly be able to find any phone that wasn't appropriate, because the phone had been invented a scant nine years before the Farm House's inception. We thought it would be fun to watch our guests delight at the discovery of a vintage phone, in working condition and looking fabulous, in each room they visited.

We soon learned that this idea was cost-prohibitive using already-restored phones, but was easily affordable if we restored the phones ourselves. This tapped even deeper into the Farm House Effect, which now that I think of it must have some relation to the nesting instinct. In any event, we soon had quite an inventory of old phones and phone parts, and I was in business.

I read up on how phones work and how they are wired, and how to re-wire them if needed to work with modern equipment. I puttered around with various phones, restoring them functionally and cleaning up their exteriors, until I felt reasonably confident in my knowledge.

Then, I undertook my first thorough restoration. I wanted to start with a black 202 like the one my grandparents had, but that would have required spray-painting the phone body, and I didn't feel I was quite ready for that. So I picked a phone that wouldn't need painting, a 1947 302.

In service from 1937 to 1958, the Western Electric Model 302 is often referred to nowadays as the "I Love Lucy phone", because it's the phone Lucy and Ricky had in their New York apartment (they updated to a WE 500 when they moved to Connecticut). The 302 was Western Electric's first model that contained all needed circuitry within the body of the telephone itself. It began its life with a body made of pot metal, but in 1941, with all metals becoming valuable because of the escalating war in Europe, Western Electric switched to a molded thermoplastic body.

We found our restoration candidate on eBay. It worked, more or less, but it wasn't very pretty.


It was missing its number card holder, and the body was heavily scuffed and in places deeply scratched.


These photos don't accurately depict the depth of the scratches; clearly someone had a serious grievance with the phone company.

Did you know that thermoplastic like this can be refinished in much the same way as is metal? At the time, I had just learned that this was possible, and I was eager to try my hand at it. 

First, I removed the body shell, and then I sanded out all the deep scratches, scuffs and dents.


Then, I sanded the whole body with a finer-grit sandpaper, taking care to remove all the scratches from the first sanding:


The basic procedure is to sand out the damage, then keep sanding with progressively finer grits of sandpaper. One sands until all the scratches of the previous grit are removed, then switches to the next finer grit and does the same thing, sanding perpendicularly to the previous pass so the previous grit's scratches are easy to discern. This continues until the scratches are fine enough to be polished out readily. This is the same procedure one uses with  metal; the only difference is that one starts with a finer grit because plastic is softer. I used wet sandpaper for all but the first two passes.

This was a long process; the above pass was done with 220 grit sandpaper, and I finished off with 2000 grit. Here's what it looked like at that point:


As you can see, all this sanding has brought the surface back to a soft shine, with hardly any suggestion of scratches. This necessarily took a long time; I typically did this work at night, sitting with the family watching Angels games.

At the same time, I was restoring the inner workings. I took everything apart, cleaned off all the dirt and corrosion, and put it all back together with replacement parts as necessary, lubricating all the moving parts and electrical connections to ensure proper mechanical and electrical function. 


Oh, yes. This picture reminds me that I restored the bakelite handset in much the same way as the phone body, but there are some differences. Whereas the body is made of thermoplastic, which is completely solid and unitary in composition, bakelite is a phenolic resin mixed with a filler, usually wood flour. The thermoplastic is molded in a melted state, and it hardens as it cools; bakelite is either molded under heat and pressure or extruded, and it hardens from a chemical reaction brought about by the heat and pressure.

Because the thermoplastic used in the phone body is the same all the way through, sanding down to undamaged material and then polishing it will restore the original appearance; because it is fairly stable chemically, it does not change appreciably with age. Bakelite, on the other hand, is somewhat unstable; while the molding process naturally forces a smooth layer of resin to the surface, exposure to ultraviolet rays breaks it down, causing a fine layer of phenyl alcohol to form on the surface. This yellows and oxidizes the surface, and eventually it begins to reflect the texture of the filler material. For this reason, aged bakelite can never be brought back to its full original shine. Thus, the procedure here is to start with a very fine-grit sandpaper to remove all the oxidized and yellowed material, then sand with progressively finer grits just until the scratches are gone and the sheen is even. This is a much shorter process than with the thermoplastic.

With the sanding all done on the body and handset, the final step is to polish them on a buffing machine with a string buff and some plastic polish, which comes in the form of a waxy white bar. This has to be done with great care with the thermoplastic in order to prevent heating the surface and thus distorting it. With the bakelite, more polish and more pressure are used in order to fill in some of the surface irregularities.

After all this, here was the result:


I was positively stunned by how nice the phone looked: wow, I did that? Aside from the finger wheel, the phone was pristine, as if it were about ten years old and gently treated its whole life. When I replaced the fingerwheel with a restored one a week later, the effect was complete. Moreover, the phone worked perfectly, with the best sound quality I had ever heard from a phone, bar none. It has ever since been my preferred phone for a good long phone conversation.

And so we had our first phone with which to wow visitors to the Farm House. It had come at a significant cost—my hands were severely weakened by the long period of constant sanding, and have even now not fully recovered—but it was worth it to have followed through on a plan with such resounding success. When we moved into the Farm House, I placed it in a fairly prominent place, and waited for the expressions of delighted surprise from visitors.

To this date, six years later, not one person has even noticed the damn phone. Not. One. Person.

The whole affair brings to mind the immortal words of the late, great Rick Nelson:

Well, it's all right now
I've learned my lesson well
You see, you can't please anyone
so you've got to kill yourself.

Or something like that.

* * *

"Get that phone, will ya? I'm not in to anybody."

Sunday, November 20, 2011

Serious Putty

When Wifey heard about my difficulty finding the fallen screws in among the pine needles, she remarked, "You could have used a magnet to find them." That reminded me that I have a magnet specifically designed for such a task that I had forgotten about. I hate to sound clichéd, but: d'oh!

Since the closing of Furnace Gap, I've been puttying my way along the rest of the belt course. It's slow work, which is why I haven't posted for a few days; puttying in progress seems like rather a boring subject, so I usually leave it out of the narrative, showing only the end product if anything.

Then it occurred to me that this whole blog could be considered rather boring unless one is specifically interested in its subject matter. One of my reasons for writing this blog is to illustrate procedures that are not generally covered in the instructional literature readily available in the usual places, and what I call "putty sculpting" certainly qualifies for that distinction. And so, all aboard the Boredom Express!

Because I must work along the long, narrow strip of the belt course at the top of an extension ladder, the work naturally breaks itself up into sections, the width of which is my safe reach to each side of the ladder: about four feet for close work, and up to six for simple tasks. Some of the patching I can do in one pass, but the more complex patches can take up to three passes. Thus, at any given time during this work I will have areas in different degrees of completeness which decrease as one moves to the left.

Here is the area I pictured in the last post, after two passes with the putty (sanded down after each pass):


It looks a lot better now, but it's not quite done; areas like this take several passes because there are many areas that need patching from several different angles that tend to interfere with each other. If I try to do too much at once, I end up dislodging putty I've already placed.

My main patching tools are flexible putty knives in one-inch and two-inch widths, but they are of limited usefulness on contoured surfaces. In the search for tools more applicable to detailed work, I've had great success looking in artists' catalogues. In the task at hand, one tool in particular is very useful, which I believe is intended for sculpting clay. Here, I'm using it to make a difficult concave patch:


Otherwise, I'd have to slide a putty knife down the divot, trying to stay close to the proper curvature: a much trickier proposition, and one that invariably leaves a big blob of putty to sand off. In contoured areas, the less putty there is to sand off, the smaller the chance of distorting the profile of the trim.

Here is this area after I completed the final patching:


This will be very easy to sand back to profile once it hardens. I'm really on my game now, such as it is. It always takes me several days to get my putty-sculpting chops back up after a layoff; it's just one of those skill sets that does not stay resident in my active mind. I really need more RAM.

From here, I moved on down to the next station, where lies the area I discussed in great detail back in April. 


Here it is before any puttying. This was the area that bore the brunt of the foundation's settling below and to the left of this picture.  This forced the left lower trim piece down; butted tightly against the right lower trim piece, the friction splintered the piece severely at its right end. In fact, the stress was so great upon this piece that cracks like the ones you see above opened up along its entire length.

At the same time, the top left trim piece was forced inwards, and the top right one outwards; this displacement is not apparent in the photo, although the resulting damage clearly is. 

Here is a close-up of the area after the second patching pass:


Now you can see clearly the significant front-back displacement of the two top pieces, but what you can't see is that the bottom half of the bottom left piece is sticking out a bit as well. I didn't see it myself until this point. Because of these displacements, the patching at this spot is going to take several more passes.

The difficulty here lies in the fact that I obviously can't completely eradicate the discrepancies here, as I was able to do for the most part with the gap in the middle trim pieces further up the belt course. I thus have to contrive to handle the discrepancies as gracefully as possible, and just how much gracefulness I can get away with will take some trial and error. More to the point, I know I can eliminate the front-back discrepancy in the lower trim pieces, but I'm not at all sure what I can get away with concerning the top trim pieces.

Tune in again for the next exciting installment of "The Trim-Jog Incident!"

* * *

Thursday, November 17, 2011

Furnace Gap, 1943–2011

As William F. Buckley might have said, he gone!


Yes, the Furnace Gap Elimination Project is complete. The task I most dreaded when I began working on the south side really wasn't so hard after all.

I've in fact finished the patching of the belt course all the way from the right end to a foot or so to the left of the Gap. Most of what remains is pretty easy except for a few rough patches, notably this one:


Looks like someone had a rough day with the hammer. I can empathize, because I had a pretty rough day myself. Nothing in particular was wrong; it was simply that I was not on my game today. Oh boy, was I not on my game today. It was one of those days when I really had no business being up on a ladder, especially not an extension ladder.

For the most part, I'm pretty comfortable on any sort of stepladder, as long as it is sturdy and on solid ground. This is because most of the time with a stepladder you can position it so that your center of gravity is firmly within the ladder's legs, tending towards the ladder, so that if you get wobbly you'll tend to wobble against the ladder.

With an extension ladder, on the other hand, your center of gravity is at best just slightly in front of the plane of your feet, and most often off to one side of the ladder. In other words, you are in constant danger of falling off if you forget where you are for a split-second. Thus, you are compelled to concentrate on two things at all times: what you are doing, and keeping your balance. 

This is why I hate working on extension ladders. Well, it's a big part of why I hate it. I also hate having to carry up all my tools and materials in a bucket and an apron, having to rummage through said bucket (hanging off the side of the ladder) and apron for what I need with one hand while holding on to the ladder with the other, and then having to carry everything back down the ladder and move it (it's heavy!) every few feet. This is unpleasant enough on a good day.

On a day like I had today, the whole affair becomes high adventure.

Not only were my eyes simply not working right, and for no good reason, but my sense of balance never really reported for work. Not that I was at all dizzy; it was just that I could never find stable equilibrium. As a result, I had to concentrate so much upon just staying up there that there weren't many resources left for what I was trying to get done. Oh, the sanding went well enough, but everything else was quite a challenge. 

At one point, I was driving a few screws up through the bottom trim piece to pull it back in line with the top; this was particularly thrilling, because I had to stay up without holding on. At that point, I had the box of screws open in the bucket so I could reach in and get them as needed; while I was driving one of the screws, somehow the bucket upended, and all the screws disappeared into the thick blanket of pine needles below. I have no idea how that happened. But hey, at least I was still on the ladder! And so I spent the next half-hour looking for pine-needle-colored screws in the pine needles, mostly by feel.

I ended up getting a reasonable amount of work done through sheer stubbornness, but along the way a few other items jumped ship. I still haven't found my pine-needle-colored nail set.

"Your nail set's stuck in your hair."

Friday, November 11, 2011

Happy Veterans' Day!


As the headline says, I hope you all had a Veterans' Day that was happy. Happy, and at least partially occupied with thoughts of the veterans, and of the future veterans, in your life. Thoughts, and gratitude.

As is evident in the picture above, I've got both the casings on the south side primed now. The rain did not appear on Friday as advertised, and the first half of it was actually rather nice, if breezy, before the cloud cover came. Nevertheless, I finished priming the west casing just as the light failed Thursday evening. Here's a closer look:


I could do some more patching work, but I have a feeling that I won't. I'd really like to be done with this side soon.

On Thursday, I also removed the mold pieces from the Furnace Gap Elimination Project, Phase I. Although I coated the pieces thoroughly with mold release agent, they at first refused to budge after I removed the screws. I suppose I shouldn't have been surprised; epoxy is, after all, an adhesive. Happily, the release agent did ultimately do its job; the pieces popped off cleanly once I persuaded them with a putty knife and a rubber mallet.


Not bad at all! I only missed one little area in the middle of the front. This does illustrate, however, the folly of assuming straight or parallel lines anywhere on the house; although the front piece was straight, and I put it on straight, still you can see that the putty line is too low on the bottom at the right. But it's not a problem; that's what sandpaper is for.


It's not a straight line, but a remarkable simulation! Note that I've extended the plane back beyond where it will meet the lower half of the profile; that's so I can maintain the gap between the two components of the belt course through the patch. Not that the gap needs to go back more than about a quarter of an inch at most, but establishing this plane now will make establishing the gap much easier during Phase II.

That, however, will have to wait until after the rain.

* * *

Thanks, Sergeant.

Thursday, November 10, 2011

Rendezvous at Furnace Gap

Today I worked on filling in Furnace Gap, the passage cut out of the belt course back in 1943 for the vent from the old floor furnace that used to sit at the bottom of the stairs. 

The first thing I did was to sink a few screws into the wood surrounding Furnace Gap in the upper trim piece. These will serve to link the putty mass mechanically to the wood, in order to prevent cracks around the patch later on. 


Not that the putty won't stick well to the wood, but these screws will keep the epoxy moving in concert with the wood as it expands and contracts with changing temperature.

Then, I attached the pieces of my ad hoc mold:


I made them wide enough to patch the divots adjacent to the hole at the same time.

Once the mold was firmly attached, I pressed epoxy up into the mold with my gloved fingers, making sure it filled the void completely and completely enveloped the embedded screws. Then, I leveled the surface with a putty knife. It took three ounces of putty.


I stopped at this point because it will make accurate forming of the patch easier. This way, I can establish a nice flat surface for the overhang, and build in the small gap between the two trim pieces much more easily, without having to depend entirely upon carving it out later. Carrying this gap across the patch is essential to the patch's blending in imperceptibly. 

I built a ridge into the bottom and kept open a path to the gap in the back so that the bottom half of the patch will key in to the top half and to the surrounding wood as well. 

* * *

"Let's see. . .f/5.6 at 1/125 sec. That should work. Now where's the danged shutter button?"

Wednesday, November 9, 2011

Reunion

With the rain all cleared out for a few days, I set about the task of finishing the reassembly of the west casing so I can get it primed before the rain returns.

After cutting the new cap pieces to fit, I removed them and prepared them for their life out in the elements. End grain is like a bundle of straws, ready to suck up any available moisture at the first opportunity. With the ends of the cap pieces pointing up at their junction, it's no surprise that the old cap pieces ended up looking like this after 126 years:


In order to prevent this with the new cap pieces, I gave the ends a pre-emptive drink of LiquidWood, standing them on end in it until they had drunk their fill. I did this on the outer ends for good measure, then wiped off the excess and gave them a ride in the dryer.


This permanently seals the end grain, and effectively counteracts the tendency of the redwood to splinter at the ends.

Then, I primed the cap pieces and aprons on all sides. The world would be a better place if everyone backprimed.


Actually, I've been doing a lot of work on the aprons behind the scenes since last we saw them in May, when I was having trouble getting the epoxy I had soaked them in to cure. I wanted them to look good so that they would blend in with the new cap pieces, so I carefully patched and sanded them. After several patch/sand cycles, they still had a great many little divots too small for the epoxy to fill.


So I pulled out an old weapon I hadn't used for years: Hasco brushing putty. This is a very fine-grained putty that brushes on as a very thick paint, but is sanded smooth like a putty once it dries. One applies it in a thick coat over a piece, then sands it level with very fine sandpaper. Its fine grain fills tiny irregularities, leaving a nice, smooth surface that takes paint readily.


SmooOOOOOth! By the way, it is now marketed in this country under the Fine Paints of Europe brand.

Anyway, with all the needed pieces primed up and ready, I re-attached the cap pieces, then nailed the apron pieces in place. That wasn't easy, because even after rehabilitation the aprons still bear the dimensional distortions of all those years of being out in the weather, so I had to account for all the distortions in my positioning of them. But I got everything to line up properly in due course.


Hey, now! Won't that wow the neighborhood.

* * *

"You missed a spot."

Sunday, November 6, 2011

I Get The Blues When It Rains

I had been on a pretty good roll there for a while, but Friday's rain really threw me for a loop. I had no idea it was coming until noon the day before, so I didn't really have time to plan for it. I just had enough time to prime the east casing, as I have mentioned.

I had enough tasks to do in the garage to keep me busy on Friday, and if that had been the end of the rain, I could have picked up right where I left off the next day. But even though it didn't rain on Saturday, I couldn't do anything I had planned, because it's quite likely to rain again on Sunday. So I had to come up with a new plan if I wanted to keep moving the ball forward.

There remains one major cosmetic reconstruction to do on the south side, and so I turned my attention to it: the divot cut in the belt course when the old floor heater was installed.

I like to call it Furnace Gap, because it makes me laugh, and when I'm laughing, my head's not in the oven. You know, when I first started painting the house, I looked up at Furnace Gap and thought it was huge, much too huge to fill in with WoodEpox alone. I envisioned either splicing in some wood and puttying it in, or making a mold from another part of the belt course and casting it in. But I didn't give any truly serious thought about the problem until today, when I was forced to do so.

So I gave it a good look from the ground for the first time in months, and after all I've been through in the rehabilitation of this side of the house, suddenly it looked rather small.


I climbed up the ladder to give it a close look.


Yep, it's really not so big, after all. I realized that there was really no problem in just patching it up with WoodEpox, if I sunk a few screws in the sides and pushed the putty into that gap between the trim pieces so there was a physical connection between the epoxy mass and the surrounding wood. Still, it would be rather a slow job doing it completely freehand.

I started to think of how I might apply the idea I used with the sills of clamping a guide to aid my puttying. There was no good place to clamp on the belt course, but I could hold the guide in place with screws on each side. Then the old idea of casting came to mind, and suddenly I had a minor inspiration. I took some measurements of Furnace Gap and its environs, rummaged around in my scrap wood pile, and soon I had this:


Now all I have to do is coat these guides with mold release agent, screw them in place, then press the epoxy in this ad hoc mold from underneath, and half the work will be done. Doing the bottom part freehand will be simple enough. I'd already be well on my way by now, if it weren't for the coming rain.

So here I sit, still stymied despite my best efforts. But at least I moved the ball forward a little today.

* * *


Saturday, November 5, 2011

I'm Cuttin', I'm Drillin', I'm Paintin'

With the junction cuts successfully executed on the cap pieces, the next step was to trim the other ends even with the sides of the casing. To do this accurately, it was necessary to attach the cap pieces to the casing first. This is because there was a chance of the pieces' moving slightly when attached, so cutting them afterwards helped ensure that the cuts will remain accurate on the finished casing.

Of course, I wanted to do my best to keep the pieces from moving at all as I attached them. Proper positioning was necessary to keep the pieces in proper alignment at their junction. Happily, I had gotten a good idea of how to get this done from re-attaching the rehabilitated cap piece on the east casing. From that experience, it only took a week of obsessing on the subject to come up with a good procedure.

The first step was to pre-drill the holes for the mounting screws through the cap pieces. To get the screws located properly, I marked where the cap pieces meet the backing piece on each end of the bottom of each piece, transferred these marks to the top, and then drew a line to connect these marks on both pieces. Then, I drilled five holes perpendicular to the top in each piece along these lines. Doing it this way ensures a good angle for the screw through the backing piece safely back from the front edge, but still far enough forward that the screws won't poke through the back of the casing and provide another avenue for the elements to enter.

The diameter of the holes through the cap pieces is large enough so that the screw threads only touch the sides, and do not engage them. This is so when the screw is driven, it will go right into the backing piece, and not just pull the cap piece away. In such a situation, the screws' entire holding power comes from the threads biting into the backing piece, so the holes in the piece to be attached need only be small enough to keep it in alignment.

I have frequently mentioned the virtues of pre-drilling, especially in old wood, to prevent splitting the wood. In this case, however, I did not pre-drill the holes into the backing piece, because if they were even slightly off-center with the holes in the cap piece, the cap piece would be pulled out of position. I felt safe screwing right into the wood in this case because the screws I used have a "drill point", a little slot cut into the tip that provides some cutting action and some clearance for the wood displaced by the screw.

The second step in getting the cap pieces installed properly was to do as much assembly as I could beforehand. To this end, I inserted screws into position at the first and last holes, positioned so that the tip was even with the bottom edge. In that way, all I had to do was to put the pieces in place, hold them there with one hand, and drive the screws with the drill in the other hand.


And so, with everything as thoroughly thought out as I could think of, I ascended the ladder with the cap pieces and the drill. I was nervous, because attaching pieces of wood in proper alignment is another one of those tasks at which I have not had great success in the past. This time, however, all my preparation paid off.

Success!

Now it was time to mark the ends of the cap pieces for trimming. I took my trusty carpenter's pencil, all nicely sharpened, and marked the cutting location on each piece as precisely as I could.


I removed the cap pieces, took them back to the garage, took a deep breath, and made the cuts. Then, I took the pieces back to the casing and re-attached them.


Wow, what a relief at last to have this done! I've been fretting about this task for months, ever since I realized I'd have to do it. And I had done it as well as I could possibly have hoped, i.e., with a minimum of patching necessary to bridge the gap.


It may be difficult to see clearly in this picture, but the horizontal placement is perfect; the two pieces meet flush at the crest. There is a bit of a gap that opens towards the front, but as it turns out, this is due to the slope on the backing piece not being constant along its whole length.


As is quite obvious here, the slope lessens considerably at the far left; this pulled the back of the left piece down just a bit on the left side, which is what caused the gap at the junction. Happily, it will be a simple matter to putty both gaps up imperceptibly.

With the cap pieces now well and thoroughly made, I took them right back off again in order to do some final preparations. Before I could get to those, however, my plans changed suddenly.

I was planning to wait and prime both casings at the same time, but just after noon, I learned that there was an 80% chance of rain the next day. I did not want the unprotected wood on the east casing to get wet, because then I'd have to sand again. I couldn't start painting right then, because the sun was shining directly on the casing, so I had to wait until the sun went down behind the trees. This gave me only about 45 minutes to work before dusk. I just barely made it, although it was pretty dark by the time I got to the apron under the sill, so I couldn't inspect my work until the next day, before the rain started in earnest.


Not bad, if I do say so myself. It's far from perfect—as I've said, I didn't have time for perfection—but I'm very gratified to see how well the top of the casing came out. The cap pieces look just fine from this distance, and the patch in the apron is, as I had hoped, imperceptible. The variances in sheen visible in places are due to differences in how the primer penetrates the putty compared to bare wood; these will be eliminated by the top coat.

* * *

. . .to boldly go where no man has gone before.