Tuesday, July 3, 2012

4/4 Blues

After a good overnight curing, I removed all the clamps and bracing pieces, and found that I had done a pretty good job of gluing the bracing pieces to the siding. I thought they were well out of glue range, but some of the epoxy crept out and seeped between the siding and the bracing pieces, causing a little damage to the plywood backing in a few places when I pried the pieces apart. 


It won't make a difference in this case, but I should have wrapped the bracing pieces in plastic wrap or coated them with mold release compound. Well, this is how I learn.

I mixed up another batch of LiquidWood and brushed it on the backs of the pieces and all of the end grain. After seeing the long-term damage moisture inflicts upon wood, sealing end grain with epoxy is a step I will always take from now on with exterior wood.


The cured epoxy. Notice that it mostly stayed on the surface. This is fine, because I only applied it to seal the grain against moisture, but in retrospect I could have used much less epoxy, because I'm just going to have to sand most of this off. I shouldn't have been surprised, because for one thing, the plywood is only 5 mm thick, and for another, I'd already saturated the other side. In any event, these pieces are ready for patching, sanding and priming.

So, on to the next task: rehabilitating the window casing boards.


What a mess. Weathered, warped, and all chewed up at the bottom end. It's going to take a lot of work to get these boards looking right. It would be so much simpler just to replace them, but there's just one little problem with that: you can't get boards in that thickness anymore.

That's the dark secret of restoring a Victorian: they don't make lumber like they used to.

It's a very complicated story, the history of lumber standards in America since the Civil War, and after some study my understanding of it is yet incomplete. Still, I'll do my best to explain the situation, over-simplifying a bit for the sake of clarity.

At the time the Farm House was built, boards were sold on the basis of quarters of an inch: 4/4 boards were nominally an inch thick, 6/4 boards 1 1/2 inches thick, and so on. I say "nominal" thickness, because boards have never been as thick as billed; the reason for this stems from the fact that way back before the Civil War, sawmills served a largely local clientele; they provided rough (unfinished) boards sized according to local standards, and carpenters finished them by hand on site.

After the Civil War, with the spread of rail transportation, sawmills began to cover larger regions, and with this development arose the need for more uniform standards of lumber sizing, and the increasing speed of development led to calls for pre-finished lumber in order to speed construction.

According to the uniform standards in place in 1885, the rule was that the dried, rough board started out at the stated thickness, and 1/8 inch was deducted for each surface that was smoothed; i.e., sanded or planed to flatness. Virtually all of the boards used in the Farm House besides the framing are 4/4, surfaced on one side ("S1S"), so they are 7/8" thick. So it is with the window casing boards.

Simply put, 7/8" thick boards are not available as stock pieces today. Boards of one inch nominal thickness are now 3/4", or even 11/16". In fact, the stock used to make the new shiplap was 11/16", which is why I needed 3/16" plywood to match them with the old shiplap. The boards used to make the window casing caps on the sides of the house were 4/4 S1S as well; in that case, happily, I had plenty of old beadboard, which was also 4/4 S1S, and plenty wide for my need.

The problem I have in the present case is that the window casing boards are 7 1/2 inches wide, and I have no old stock to accommodate that width. Moreover, shimming new thinner stock out with plywood isn't a viable option, mostly because the edges would in that case be exposed and I could never satisfactorily disguise them.

So I must rehabilitate the old boards, or spend an inordinate amount of money to have new ones specially milled. Yes, time is money, but my time is not that much money. So, as Joseph P. Kennedy (John F.'s father) said, "When the going gets tough, the tough get going."

Of course, he also said, "Don't buy a single vote more than necessary. I'll be damned if I'm going to pay for a landslide." Joe Sr. was no Vince Lombardi. But no matter; I'll take the truth wherever I may find it.

* * *

"Open open open open open open open open open. . ."

Saturday, June 30, 2012

Wails And Laminations

After getting a good look at the three pieces of shiplap siding I removed from the dormer, I decided it would be best simply to replace them. Not only did one piece have the entire overlapping part missing from the bottom, but they were all water-damaged and quite badly hacked up. Moreover, they have clear evidence of the original body color on them, so I'd like to stabilize the paint to slow further degradation and keep the pieces in the growing archive of building elements I'm assembling that will stay with the house in order to provide documentation of its history going forward.

This decision was made easier by the fact that I have several hundred board-feet of new shiplap in stock from the construction project. There is but one little problem with it: while the facing profile is an exact match, it is 3/16" thinner than the original. We did this so it could be milled from stock lumber, thus saving us a great deal in material cost. 


This is no problem, because all I need to do to make them match with the existing shiplap is shim them out with 3/16" plywood. Well, actually it turned out to be a bit of a problem because all Home Despot had was 5 mm plywood, but since that is only about a quarter of a millimeter thicker than 3/16", I figured I could work with it. At this point in the project, I'm in damn the torpedoes mode.

I could simply have cut a triangular piece of this plywood to fill the entire area behind the shiplap, but I decided instead to cut out individual pieces and laminate them to each piece of shiplap. I did this for two reasons: first, the new shiplap tends to split when cut in short lengths, because it is thinner and made from less dense wood than the original. Laminating the plywood with epoxy onto the pieces will significantly strengthen them. Second, the plywood is not rated for exterior use, so I want to coat the back side with epoxy as well to protect it. This is easier to do with individual pieces that are already epoxied on the front.

This is not a complicated procedure, really, but since I've never done it before (with the exception of the tiny trim piece on the window casing), the setup required a lot of careful planning on my part so I didn't screw it up.

The first thing I did was to rip a strip of the needed width from the piece of plywood. I did this with my handy-dandy circular saw and a plywood blade.


It was then a fairly simple matter to cut pieces from the strip to fit the back of each piece of shiplap exactly. Here's one of the completed pairs.


I've found from experience that it's always a good idea to dry-fit glue setups before applying the glue to make sure that everything is going to go together nice and tight. This minimizes scrambling to make adjustments while wet glue is setting.


Thus prepared, I mixed up a batch of LiquidWood, and after letting it sit for 20 minutes to get the reaction going well, I brushed an even coat on the mating surface of each piece and clamped everything together.


As I said, I'd never done laminating on this scale before, so as you may have noticed I ended up having to use more clamps on the two smaller pieces to offset the hydraulic pressure of the epoxy pushing the pieces apart. I ended up using every usable clamp I have. Except this one:


And so the pieces sit as the epoxy cures.

* * *

"Did someone say 'dinnertime'?"

Tuesday, June 19, 2012

Unpacking A Mess

In the last post, I mentioned that I had figured out what to do about a scaffold to aid my work on the large dormers, but I had yet to work out the details.

That task took me some time, largely because it took me a while to figure out how to attach the roof jacks to the roof. Here is one of the roof jacks:


My problem was that the instructions assume that you are using these to apply shingles to a roof, so you are going to attach these to an unshingled portion of the roof. I am of course using these on a finished roof, so I took a lot of time trying to figure out a way to avoid nailing through shingles. Ultimately, I realized that I couldn't avoid it, so after a bit of time to work up my courage, I proceeded.

Here's one of the nails of the size specified in the roof jack installation instructions:


Now do you see why I had to work up my courage? These are twenty penny (20d) nails, and three of them are required for each jack. The thought of driving these things through the Farm House's tiny, brittle roof joists was chilling. Nevertheless, the thought of falling twelve feet and landing on my back was even more chilling, so I did what I had to do.


You can be sure I was extremely careful in locating dead center on each joist, and also that I pre-drilled each hole before I drove the nail in.

Here's the finished scaffold:


The board I'm using here is a scaffold plank, which is specifically engineered for this purpose. It's flat, rigid and heavy. I purchased several of these in the 12-foot length and two trestles from the man who rented us the big scaffold we used on the north side; I'd planned to use this setup on the south side, but that didn't work out. Nevertheless, the planks have already proven their utility in several ways. I even used them to help me level the ground for an enlarged pad for a new gazebo to replace the one destroyed in the windstorm. They are actually quite affordable if purchased used, and if you have the room I recommend you pick up a couple. By the way, the plank is nailed to each jack to keep it in place, and I must be careful not to step on the plank beyond the jacks on each end. 

Now that I was able to get a close look at the entire dormer, I performed triage to locate any problem areas that I would have to address before I started surface preparation in earnest. This area immediately caught my eye:


The hardware cloth indicates that this is a hole that was plugged by our pest control man, as was the hole in the middle dormer that I filled with foam. Notice that the shingles, quite oddly, rise up the side of the dormer in this area. I removed the screws and the hardware cloth to find this:


Well, this is troubling. The remaining piece of hardware cloth covers a hole caused by a missing piece of siding, there is a piece of flashing running behind the trim piece, and there is a large glob of caulk emerging from behind the flashing and continuing along the end of the sill.

As I've said, houses tell stories, and the story the Farm House is telling here is that the contractor was aware of this problem, and that rather than address it he purposely covered it up. Swell. I was there working alongside the contractor much of the time, and I checked a great deal of his work, but I didn't check everything; so far, I've found that whatever I didn't check was not properly done. Now, we're almost certainly going to have to hire a roofer to fix this, and a similar problem on the other side of this dormer, once I am done with it. Maybe I can have him repair the holes I made for the scaffolding at the same time.

I removed the trim in front of the siding, then removed the broken piece of siding. It was at that point I noticed another problem:


The arrow is pointing to it: the bottom projection is missing from that piece of shiplap, exposing the joint to the elements. So both pieces have to come off, as does the casing board on the front, so I can get the broken piece off without breaking the piece above it.

Which is just as well, because all three casing boards have to come off anyway. Here's why:


This is the board on the other side. Note how it's bent out at the bottom, causing a gap through which insects can get into the weight pocket and thus the house. All three boards are like this. I assume that absorption of moisture wicked up through the unprotected end grain on the bottom caused the boards to swell, and thus to elongate; there was no place for that extra length to go but outwards. These boards have to come off so I can correct this.

With triage thus completed, I proceeded to remove all the necessary pieces with the utmost of care. It's always an iffy proposition to remove old wood pieces, because they are often quite fragile. For this purpose, I have a set of low-friction plastic wedges that persuade wood gently:


I tap these in gently, walking them up each side until all the nails have broken free. From there, I can then remove the pieces pretty safely with a pry bar. After I removed all the pieces and vacuumed the 126 years of debris from the weight pockets, here is what I have now:


This gives us a rare opportunity to view the internal construction of the Farm House.


It's startlingly sparse, isn't it? Lath and plaster (which is what the arrow is pointing at) on the inside, shiplap siding on the outside, and nothing but three inches of space and some small framing members in between. As I've mentioned in the Journal, Victorians built their houses light, in order to keep them stiff and strong. Nowadays, we use tons of wood and steel to accomplish the same thing.

You can see evidence of moisture infiltration quite clearly on the corner framing member; it's indicated by the dark area on the bottom two-thirds. the stud next to it shows it too. This undoubtedly was caused by the exposed joint where the strip of wood broke off. The back of this broken piece of siding provides further evidence:


That's why I have to replace this piece; I really can't make a reliable repair in this location, and left unchecked this kind of damage will eventually lead to loss of structural integrity.

The front of the same piece is actually far more revealing. Here's a detail of it:


The yellow area is the first truly clear evidence of the original body color of the house. It was protected by a later layer of roofing applied over the original roof cladding some time before the current coat of olive drab was applied. Note also that this provides clear evidence that the body of the house has indeed been painted only twice in its history prior to my current efforts, as I had already concluded; you can even see the yellow coat showing through the olive in places. Tucked in against the roof and in virtually constant shade, this is one of the most protected areas of the exterior, which is why this clear visual evidence managed to survive.

I must also point out, with a great sense of astonishment, that this yellow is the very color I selected for the body color in my original color scheme, as documented in the Journal:

Initial color study: north elevation

In fact, evidence I've found while working on the house indicates that, with the exception of the shingled gables (which were unpainted), I in essence recreated the Farm House's initial color scheme. I've found evidence of dark green in the trim, but I couldn't determine whether it was a forest green or more of a slate green; as for the red of the sash, you can see it here in the transom above the front door where I scraped off the paint in order to re-glaze the window:


In all humility, I'd attribute this synchronicity to equal parts of startling coincidence and good research. That, or I'm a freakin' House Whisperer, man!

In case you're wondering why we changed the color scheme, it was because we felt that it violated the Victorian precept that a house should stand in harmony with its surroundings. We concluded that the brightness of the yellow would make the house stand out too much, and make it appear larger than it was. Moreover, there is very little mustard yellow to be found in the natural elements of the lot.

Ultimately, we took the house colors from the most dominant natural feature of the lot, namely the pine trees. The green comes from the needles, and the rest of the colors come from the various colors of the bark. Our result is indeed a genuine High Victorian scheme; it's merely that there is enough latitude in such schemes to accommodate our slight tweaks.

By the way, I haven't yet installed the fall protection gear I mentioned last time, but I feel pretty safe nonetheless, for I am well-supervised:


I am very seldom alone here. I really love that. I'm a pack animal myself.

* * *

Must be dinnertime.

Friday, May 18, 2012

An Instructive Transformation

I've finished the bathroom dormer, which means that it's time for my favorite feature, Before and After.

Before
After

It's like magic! Decked out in proper Victorian livery, the ornamentation no longer seems arbitrary. Although there are four distinct colors there, the effect is to bring all the elements together as an organic whole.

Perhaps my meaning will be clearer if I show you a street view of the house:


To my eyes, the center dormer now appears to be emerging out of the roof—an integral part of the structure—whereas the two monochromatic dormers appear to be sitting on top of it. Of course, the Victorians had their quite specific reasons for painting homes this way—they were the thinkingest people you ever did meet!—but the simplest way to explain it is that by echoing the design of the large main gables in the small dormer gables, and then by painting the corresponding elements precisely the same way, the dormers are integrated into the house, rather than looking like stuck-on appendages. Imagine how striking the effect will be once we restore the tiny little bargeboard that belongs in the dormer gable!

Prepping and painting this little dormer proved to be a great deal more difficult than I had hoped, in large measure because it was so fatiguing to stand on a surface that was sloping away from it. The fact that the surface was simultaneously sloping towards oblivion didn't help. Moreover, the rear of the sides was just out of my reach, and the peak of the roof was considerably out of range. I tried to access that area from on top, but I found working upside down to be dangerously disorienting at such a height. I thus had to work on this area—sanding, masking and painting—while hanging from the dormer roof by one arm. I'm particularly proud of the fact that I painted the top two courses of shingles freehand while hanging that way, cutting right up to the green of the eave and managing a straight line without masking. Did I say "proud of"? I meant to say "astonished beyond belief by." Really, I don't know how I managed that, given my general lack of equilibrium and my once-again-poor eyesight. Sometimes, very rarely, the Unseen Hand actually seems to help me out. The Unseen Hand has a sporting side, apparently.

I can't rely upon its continued assistance up where the blues begin, however, because the other dormers are considerably larger, and hanging from the roof ain't gonna get it done.


This is the north dormer, the next task on my list, and it's shown here in roughly the same scale as the smaller dormer above. You can infer from this that about 60% of this dormer is out of my reach, but it's actually more than that, because the veranda roof slopes off on the left side.

This is in fact a problem that has troubled me since I started working on the house eight years ago. It's taken me that long to figure out what I'm going to do: use roof jacks to support a scaffold plank, as a roofer would do, and wear a safety harness to guard against the very real possibility of falling. I have the basic materials, but I have yet to figure out the details.

While I'm doing that, there is a lot of work I can get done on the areas I can reach without help. While the bathroom dormer was in such bad shape that the sill and vertical boards had to be replaced, here as you can see the original materials are still present, and will need a lot of the same reconstructive work as I did on the window casings on the south side. 

One difference here is that the vertical boards are unornamented; not only does that greatly simplify restoration, but it also allows me to use Bondo, which is considerably faster and cheaper than WoodEpox, and in this application just as effective.

So there will be lots of new ground to cover, cats and kittens, and I hope you all will find the proceedings to be interesting and informative.

* * *


Saturday, May 5, 2012

My Dog Ate My Paintbrush

First of all, happy Cinco de Mayo! The day means much more to me than it otherwise would because it marks the luckiest day in my life. Nineteen years ago on this day, I met my future wife. So, happy Cinco de Mayo!

It's been nearly a month since I last posted. At that time, I was fixing to mask so that I could paint the middle dormer. As I write, I have masked off the roof flashing, and that's it. It's not that I've been lazy, it's just that life and the weather intervened. Honest!

I've been working on the grading for a larger gazebo pad since February, whenever I had some time to spare, but the work got to a stage where the pups were starting to mess it up by their cavorting. And so, with the prospect of questionable weather approaching, I decided to give the gazebo project top priority until it was done.

The old gazebo pad wasn't large enough, and there was a lot of erosion towards the back of the lot, so I decided to double the pad's size and build a little frame at the low side to keep things level and neat. It was a lot of hard work, because I had to move a lot of dirt from elsewhere on the lot. I took it from the far side of the garage, where I need to do a lot of regrading anyway.


I finally finished it last week. I had planned to do some how-to posts on the surveying and grading, but I couldn't manage to make the telling of it anything but boring. Perhaps I'll try again later. Anyway, Wifey and I put up the new gazebo a few days ago, and here is the finished project:


The pets of course all love the open area of fake turf.

The pups, Peter and Sally, are six months old now, and starting to look like half-sized editions of their future selves.


They've become significantly more well-behaved in the past few weeks, which is a fortunate thing, because they've entered another big growth spurt. Peter is going to be huge once he grows into those ears; Sally should end up to be about Nellie's size.

Oh, yeah, the painting. Anyway, the weather has been wet with annoying unpredictability and timing, which has either made it impossible to paint or led me to believe it would be impossible to paint. It looks like I've got some clear sailing now, however.

* * *

"Ay, ay, ay ay, canta y no llores. . . !"

Saturday, April 7, 2012

Filling A Gap with Foam

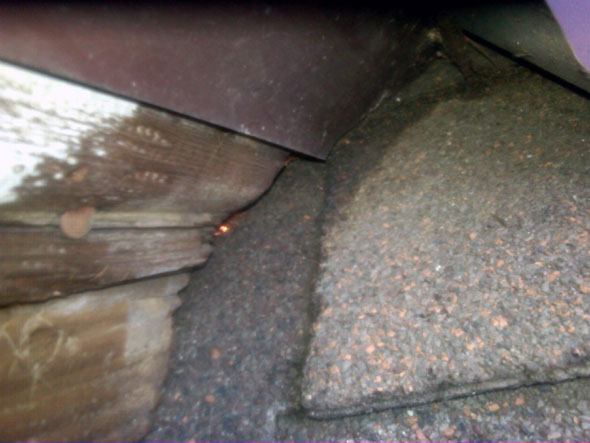
As promised last time, today I worked on plugging up that rodent hole at the back of the dormer. First off, here's a better picture of the gap:


There's a lot more copper mesh in there than it appears. It's there to capture the foam filler, to impede its progress so that once the mesh fills up, the foam backs up and fills the front of the gap solidly rather than simply continuing to move inward. Copper mesh is available from gardener suppliers, but in a pinch a copper pot scrubber would serve perfectly well.

As I mentioned, I obtained foam filler that is intended specifically for filling exterior building cavities such as this one. This is not the type of foam one generally sees at Home Depot, intended for filling gaps around windows and doors (although it serves for this purpose as well); it's denser, thoroughly weatherproof, and expands instantly. I purchased it from Gempler's, which is my supplier of first resort for a majority of my Farm House maintenance needs. 

I must admit, I was pretty daunted by this new, super-duper foam, because it comes in a huge can and is applied with a pretty impressive-looking gun.


This rig fairly shouts PROFESSIONALS ONLY, and as silly as it sounds, I wondered whether I had the chops to wield it effectively.

As it turned out, it's much easier to use, because the volume of foam is minutely controllable using the adjustment knob at the back of the gun, and the speed of its exit is easily modulated using the trigger. Thus, after some practice shots in the garage and some adjustments, I was able to place the foam right where I wanted it as easily as putting toothpaste on a brush.


After a half-hour of curing, I was able to cut the foam back to its intended boundaries with a utility knife.


It's not terribly pretty from this close up, but from the ground it blends in undetectably. Now, the gap is filled more or less permanently, impervious to critters and the weather.

One last point about this foam rig: if you leave the can on the gun, clean off the tip and close the adjustment valve completely, the foam will stay fresh indefinitely, so that you can keep using the can until it is empty. The Home Depot types that dispense directly from the can are good for one use only, no matter how little foam is actually used, because the foam cures in the applicator tube and blocks the exit of the remaining foam.

That's huge, because not only does that make this system more economical despite the cost of the gun, but it means that as I find any gaps as I work from now on, no matter how small, I can quickly and easily fill them with little added cost or fuss. I wish I'd had this rig from the start of the work.

And with that, it's time to start masking so that I can paint.

* * *

"I remain thoroughly disgusted by the rank 
anti-rodent bigotry of this establishment."
"No rodents, no peace!"

Friday, April 6, 2012

Fun with Dormers

Since last I wrote, I've been busy repairing, sanding and patching the dormer. It's taken a long time because of the vagaries of weather, and the sheer difficulty of reaching the back and top of the dormer. To sand the very top, I found it easier to climb up on top of the dormer and reach down.

The view from the crow's nest.

Complicating matters further is the fact that the level of the new roof is over an inch lower than that of the previous roof. The old roof consisted of wood shingles sandwiched between layers of sheet roofing on top and substantial redwood slats underneath. The new roof is one layer of plywood sheathing with three-tab dimensional asphalt shingles on top. The receding roofline left in its wake lots of wounds and irregularities where the formerly submerged dormer cladding was uncovered, and an awkward gap underneath where the cladding ends and the underlying structure is exposed. I'm still not sure how that gap will look when the dormer is painted; in fact, I'm not sure just how much detail will be visible from the ground, so I'm uncertain just how detailed I need to be in my patching. I may have to do another round of patching after I prime.

Here's what the dormer looks like right now:


The push broom is there to provide a handhold when working on the furthest extent of the sides (the broom head is securely attached to the handle and well-braced).

You can see that the sides are pretty messy, but I'm hoping that a good coat of paint will take care of that.

One more detail remains before I can mask everything off and start to paint. There's a gap at the back of the right side between the eave trim and the roof that opens up to the inside. This is just the kind of thing rodents use to get into attics, and it needs to be plugged up. We did have some hardware cloth covering the gap, but I'd like to replace it with something more permanent, and more presentable.

Here's a picture of the gap:


It's larger than it appears here, but in any event, you can see a bit of shiny copper material peeking out from inside the gap. This is copper mesh. Gardeners use it around planters to keep snails out; pest control people wad it up and stick it in gaps like this to serve as a backing for insulating foam filler. You will recall that I used a foam filler to fill a gap underneath the new window in the south side; the foam I will be using here is similar, but is specifically designed for this kind of situation. It's completely weatherproof, paintable, and impervious to rodents.

It's also a big mess, so stay tuned. This should be fun.

* * *

"I don't see why you don't just let the rodents come in, you spoilsport."