Showing posts with label Procedures. Show all posts

Wednesday, December 23, 2015

For The Birds, Part 2

To recap the story so far, our old feeder and pole had been damaged irreparably by an onslaught of corpulent doves, and after an inordinate amount of difficulty, I managed to assemble a new feeder and locate a stronger pole that needed some modification before I could use it.

The new pole was ten feet long, which meant I had to dig the existing hole two feet deeper in order to mount the feeder the required six feet above ground—four and a half feet deep in all.

The added depth was a bit of a concern. Our soil is riddled with boulders, some of them quite large. I was lucky the first time around in that I encountered no obstacles, but I was really pushing my luck going two feet further down. I hoped I didn't have to blast.

Of course, I could simply have cut two feet off the new pole and made the job a whole lot easier. I didn't do that because rigid electrical conduit is heavy, and as I mentioned last time, it has a certain amount of flex in it. With the feeder at its top, it will have a tendency to flex back and forth in heavy winds, and the flection could conceivably extend down below ground level, increasing the risk that the pole will work itself loose and start to lean. The deeper footing should prevent that.

I pulled the old pole up, and was very happy to see that there was no rust on it to speak of. This was a nice verification that six inches of rocks in the bottom of the hole was sufficient drainage, even in our slow-draining soil.


Then, I started to dig. The first two and a half feet of the hole was easy, because all I was doing was emptying the hole I'd already made. I saved the sand from the first two feet in one pile, and the rocks and dirt from next six inches in another, so that I could re-use the fill.

At the Farm House, we even recycle dirt and rocks.

From that point on, the work was considerably more tiring. I haven't done any really hard physical work since my last bout of tendinitis in January, and on top of that I had had that spell of pneumonia. My arms and lungs were thus in need of a good workout, and boy, did they get it now.

On the way down the hole, I needed frequent rest stops in order to catch my breath, and so to keep things moving I decided to alternate the hole-digging with the task of reducing the diameter of the top of the pole so that the receptacle on the bottom of the feeder would fit. I have very little experience working with steel, but I figured a file would be the right tool for the job.

I have an extensive collection of files inherited from my uncle, so I picked out the most appropriate-looking one, cleaned its teeth with a brass brush, and started filing away. I went slowly and methodically around the circumference of the pipe as far in from one end as would be necessary to accommodate the receptacle. Once I came back around to the starting point, I slipped the receptacle over the end to check the fit. It slipped readily along as far down as the pipe threads went, and then stopped. I filed around the pipe again where it was still too big, and when I checked the fit again, the receptacle progressed about a sixty-fourth of an inch further down. It seemed as if I were taking off a lot of material, but apparently I wasn't.

So I worked around the pipe once again, more aggressively this time. This yielded another sixty-fourth of an inch of progress. Something seemed wrong. I did a little research on the Internet, and learned that I was using the right kind of file, and I was using the proper technique, more or less. So I abandoned the hole-digging for the time being, and worked on that pipe for the rest of the day and well into the evening. While my arms benefited from the exercise, I didn't make much progress. Still, the project up to that point had been so full of mishaps and complications that I just accepted the situation. I was happy that I was making any progress at all. I was a hostage to fate, and the Helsinki syndrome had set in.

Wifey suggested that perhaps the file I was using was dull. That had not occurred to me. The file looked perfectly fine. There were no broken teeth, and there was no evident wear. Still, she had something there. After all, my uncle had inherited his father's tools. There was a very good chance that the file I was using was older than I was, and had been used a lot. Moreover, it had been kicking around in a tool box with a number of other files for a long while.

The next day, I got a new file of the same type and went back to work. In an hour I was done, and the receptacle slid down fully without binding or wobbling. I primed and painted the filed area to prevent rust.  


While I may not be the sharpest tool in the box, with Wifey's help I feel as if I can do anything. We make a good team.

With the pole now all ready to meet its destiny, I went out and finished the hole. There are tools made specifically for this purpose that make the job simple: the post-hole digger, and the digging bar.


I use a post-hole digger of a unique design, called The Hole Deal, and I highly recommend it over the traditional design. All post-hole diggers comprise a pair of shovels joined with a pivot so that when the shovels are brought together, they capture soil between them that is then lifted out of the hole. The traditional design joins them with a simple pivot, so that the handles must be separated to bring the shovels together. This gets progressively more difficult as the hole gets deeper, because it is hard to keep the soil in the digger when the sides of the hole are limiting how much the handles can be separated.

The Hole Deal uses a two-pivot design so that the handles and shovels move in parallel; its handles are brought together to bring the shovels together. The sides of the hole and its depth are thus not limiting factors, and it is very easy to keep the dirt captured between the shovels as the digger is lifted up. This allows one to dig holes that are plumb and uniform all the way down. Although the digger is only five feet long, I had no difficulty in taking the hole down to four and a half feet without my having to widen the top of the hole.


The other tool is called a digging bar. It is a six-foot-long iron bar with a chisel end and a tamper end. The chisel end is used to loosen the dirt at the bottom of the hole to make it easier to remove with the post-hole digger; the tamper end is used to settle and compact material at the bottom of a hole. The digging bar is also used to dislodge and break up rocks, or cut roots, as necessary.

Happily, I encountered absolutely no obstacles on the way down, so while the work went slowly, it also went steadily. I got so enthusiastic at the end that I actually went an inch farther than I needed to. Then I had lunch.

You may be wondering why I set the pole in sand, rather than concrete. While there are several advantages to the use of sand as a base, the reason I used it here is that we have no overall plan for the yard design, and until we do I don't want to build anything that I can't easily remove. If you think a concrete footing would have kept the old pole from leaning, take a look at it:


Clearly, the sand held the pole so firmly that it bent at ground level; it did not shift in the hole. If I had set the pole in concrete, I would have had to excavate and lift out a hundred-pound cylinder of it, and then I would have had to dispose of that.

It occurred to me when contemplating the pole with the socket that I could have sunk the socket in concrete in order to give it some measure of stability, but without drain holes at the bottom it would have rusted out in short order, causing the pole to move back and forth in the hole more or less constantly. This movement would dislodge the concrete plug soon enough, and the pole would fall over.

I could have put down two feet of concrete to prevent its being easily dislodged, but then I'd have that hundred pounds of concrete to remove someday. This was altogether too much work for a setup that would never have been satisfactory.

The best material to use for setting poles in sand is actually not sand, strictly speaking, but crushed granite (usually called "decomposed granite", or "DG" for short). DG is the best because its individual granules are jagged, and tend to interlock pretty firmly when the material is compacted, making it quite stable and resistant to movement. This is why it is used for baseball diamonds and "gravel" driveways; as I've mentioned, we use it for our own driveway.

Unfortunately, DG is generally not available in smaller than half-truckload lots, at least not hereabouts, so instead I use paver-base sand, which is readily available in 50- to 70-pound bags. Paver-base sand is silica sand of a uniform fine grain; it interlocks to a lesser degree than DG, but it is more than stable enough to serve nicely for setting poles. Building sand will work if necessary, but not playground sand, which has no silica and offers insufficient resistance to movement.

A word of caution: never handle any silica-containing sand when it is dry without breathing protection, because silica dust acts like sandpaper in the respiratory tract. It is best and most convenient to work with it moistened enough to prevent dust from kicking up.

After lunch, I screened the two piles of the material I'd removed from the original hole in order to remove debris and reclaim the stones that were in them. 


I put a layer of larger stones down as evenly as I could at the bottom of the hole, put the rest of the stones back in, and tamped them down with the tamper end of my digging bar to minimize any settling when the hole was filled. I ended up 3/4 of an inch higher than I wanted, but that is close enough for my purpose, and the extra drainage won't hurt. I put in water to just above the level of the rocks, and let things settle overnight.

As I mentioned, our soil drains very slowly.

But I was not yet done for the evening. I drove four three-foot wood stakes into the ground, each about two feet away from the center of the hole, two of them situated roughly parallel to the back wall of the house, and two perpendicular to it.


When tomorrow came, I lowered the pole into the hole slowly, taking care to land the pole somewhere in the center. Precise positioning is not crucial, but a position near the center ensures that the pole is supported evenly around its circumference, thus increasing its tendency to remain plumb as the sand settles. As it happened, the pole found a nice little niche within a half-inch of dead center. This positioning is ideal, for it locks the bottom of the pole firmly in place, further enhancing its tendency to remain true to the earth.


Having achieved this, I carefully moved the pole over to rest against the side without knocking it out of its niche. I took a length of sash cord (any rope will do), tied one end to one of the wood posts, looped the other end around the pole and tied a taut-line hitch around the cord. This is a knot that I learned back in Cub Scouts, very useful when you need to adjust the length of a rope under tension. I use the knot shown on Wikipedia as #1857 (the third one listed at the link).

I did this for all four posts, all the while moving the pole gently to avoid dislodging its bottom end. Then, I attached a post level to the pole at eye level, oriented it so one side was parallel to the rear wall of the house, then I adjusted the length of each rope by sliding the taut-line hitch towards or away from the pole until the bubbles in both horizontal vials were centered. indicating that the pole was plumb (i.e., perpendicular to the ground). I tightened the cords just enough to ensure that the pole stayed plumb, and no tighter.


This reminds me that I have forgotten to tell you about the post level, one more specialized tool used in this job. It has two spirit vials positioned horizontally at right angles to each other to check for plumb, and one positioned at a right angle to the other vials vertically to check the top of a post or beam for level with the ground. 


This gag with the ropes and wood posts was something I whipped up this time around, so I would be free to work with both hands without undue worry about keeping the pole plumb. I've put poles up several times before without doing this, and it was quite awkward filling the hole with one hand while trying to keep the pole plumb with the other.

I worked with the posts and the level oriented to the house's footprint because the feeder would most often be viewed from the house. Theoretically it doesn't really matter how one orients the posts or the level, but a post level is not a terribly precise instrument, and orienting things the way I did maximized its precision along the most-used sight lines.

With the pole thus secured, I filled the hole back up, starting with the screened sand I took out of the old hole and continuing with some new sand. I put it in a trowelful at a time evenly around the pole, stopping every six inches or so to wet the sand evenly, putting just enough water in to cover the sand and then letting it drain in order to eliminate any little air pockets and to get the sand to settle evenly and firmly.


At eight inches below ground, I switched from sand to decomposed granite, which I stole from my supply that I have for filling divots in the driveway. I put in six inches of it just to help keep the pole on the straight and narrow path. I topped up the last two inches of the hole with screened dirt to give the installation a finished appearance, then let the whole hole settle overnight before I put a load on the pole.


Early the next morning, I put the feeder in place, and Wifey set a table of tasty comestibles for our little pals. As is always the case with a new feeder, it was greeted with great skepticism at first; the little creatures of the forest are rightly skeptical of change. By mid-afternoon, however, we had our first hungry customer.

This reminds me that my next job is to clean the gutters.

Our feeder is open to all our little woodland friends. But as for the company that sold us the feeder with its crappy screws and instructions as well as that pathetic excuse for a mounting pole, the company with the buncombe-laden product descriptions, the company that through its malfeasance turned a simple task into a major project—well, that company is strictly for the birds.

* * *

"My client is prepared to plead to one count of PC 481(a)(2), Knocking Non-Glass Ornament Off Christmas Tree, if the count of PC 666(e), Grand Theft Bird Ornament, is dropped."

Thursday, July 3, 2014

Video: Rough Patch of The Casing Boards

I've done the first pass at patching and sanding the casing boards, a major step in the restoration process that I discussed in detail when I restored the casing boards on the north dormer. It occurred to me that a brief video showing the results of the first pass this time might be effective in clarifying some of the details of the work that were left unclear the first time.

I've been planning since I started this blog to use video from time to time to illustrate processes, but I learned early on that making a decent video is harder than it seems. Thus, while I've made dozens of video presentations for you, most of them have stunk for one reason or another. 

I think I've come far enough along the learning curve now to start using this method more often, and so, here you are. I'm afraid that I left a few details out of my narration, however, so let me add them now.

Patching to this extent is a complicated process requiring several passes, and with this first pass my intent was to fill in the major voids and irregularities on the front of the boards, including the re-building of the edges. While I subsequently sanded the sides back all the way, the fronts I only sanded far enough to remove the rough edges and ridges and begin to establish a flat surface. 

I left the putty somewhat above the eventual plane of the finished board so that there would be enough depth in the remaining voids to allow the putty to take hold in them. If a void is too shallow, the friction of the putty knife will pull the epoxy right back out as it passes over, and if I pass the putty knife too high, all I will do is replace the divots with bumps that will be a pain to sand back down. By sanding high with this first pass, I will be able to fill in more of the small divots successfully, and then sand the entire surface down at the same time to the proper level.

One more thing I forgot to mention: while I previously discussed my intention to use Bondo for this first pass, I subsequently decided against it. While I did use it successfully on our Culver City home, and the work has held up for over 15 years, that was in an area with little exposure to the sun. I don't know how it would hold up in full sun in the harsher Pasadena environment, nor do I know how well it would get along with the WoodEpox I would have used for subsequent passes. Given the prominent position high in the front of the house, I didn't want to risk the failure of the patch down the road, and the virtual impossibility of effecting a permanent fix if it did. 

Now, without further blather, here's the video.


* * *

"This video stinks, too."

Monday, June 30, 2014

Silly Putty

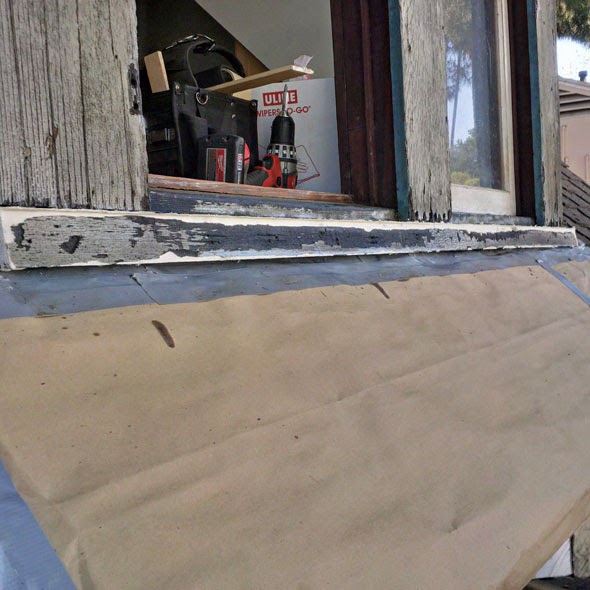
With the sashes back in place and fresh WoodEpox at last in hand, it was time to get back to the sill work.

As I mentioned a few posts back, the reason why I needed fresh WoodEpox was that the tub of Part B of my prior supply had fallen and gotten cracked, exposing that material to the air. Hoping it had not been that way for long, I went ahead and used it. Apparently it had indeed been that way for a long time, because I found the mixed putty to be very stiff and hard to tool, creating quite a mess.


When I removed the forms. I discovered that although I had done my best to work the putty into the forms, it had actually gone in only a very small distance, falling far short of filling the gaps.


This may not look like a particularly bad result, but I had failed to establish enough of an obvious shape for me to be able to proceed on eyeball judgment alone. I needed more guidance than this blob of a half-done sill was giving me. 

So the first thing I did, once I turned my attention back to the sill, was to put the forms back on and slowly sand down the high spots, using the forms as a guide, while being very careful not to sand the forms themselves. Once I got as close to them as I could, I took the forms back off and proceeded from there.

Still needing more guidance, I made a cardboard template of the north sill. First, I used my trusty profile duplicator tool, making sure I took a nice straight reading perpendicular to the front surface.


Then, I transferred this profile to a good stout piece of cardboard and carefully cut along the line with an X-Acto knife.


Before proceeding, I checked the accuracy of my template by comparing it with the original. It didn't have to be absolutely accurate, but I was very pleased with how accurate it was.


I was then able to use this template to evaluate just where to sand, and where to add more putty. Eventually, I realized that one of the problems that was throwing me off was that the sill had a crack all the way through to the back that was not immediately evident because it occurred at the inside angle right where the lower sill met the upper sill, so there was no visible irregularity along the crack itself.

It was quite a long crack, reaching from the left side all the way to the left edge of the middle casing board. Apparently, the roofers had jammed shingles behind the split part, causing it to flare gradually forward so that it was a half-inch further out at the left end than it was in the middle.

There wasn't any point in trying to correct for this, mainly because it was a gradual-enough deviation that it was undetectable unless one was actually standing out on the veranda roof looking down at it. So, I drove some screws down at the proper place to stabilize the sill and prevent further movement, then puttied up the screw holes and proceeded as if everything was going really well. The fact is, it was going plenty well enough.

Then I noticed that the upper sill under the left window opening was quite worn down, so that it was a quarter-inch low in the middle. This was strange, because the other three upper sills had not had more than superficial wear on them, having been relatively protected behind screen frames for most of their existence. I immediately thought to myself, why did this happen? What is the house trying to tell me about its past?

Then I realized that what it was telling me is that I'm an idiot. I had gone in and out of that very window hundreds of times while working on the north dormer, usually quite clumsily. I had caused that wear my own dang self!

Properly humbled, I cut a guide strip, coated it with mold release compound, and built the upper sill back up in that window.


With everything all nicely filled in and sanded, I took another reading along the entire length of the sill with my template, and realized that, once I corrected for the flare on the left side, the front of the sill curved back towards the house at each end. You see, back when I had first attached the forms to the sill, before I'd put on any putty, I had forgotten to correct for the increased wear that naturally occurs along the front of a sill at each end. I really should remember to review my old posts when I start to do something I haven't done for a while.

And so, more guide strips, and more putty.


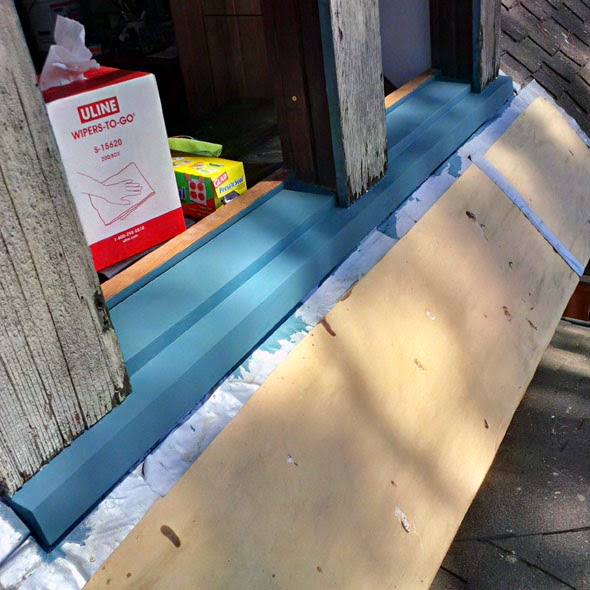
Then, remove the forms, fill in the screw holes, sand a little more, and voilá! A nicely-restored sill, at last. Note that the narrow strips of sill between the casing boards are far less worn than the rest of the lower sill, as evidenced by how much of the actual wood is still showing there. This is more evidence that these windows had screens for most of the house's existence. 


Then, one last step: a coat of primer to protect the epoxy putty from that nasty old sun and its fatal ultraviolet rays. I learned that lesson with the north sill, when I had to do some quick re-patching at painting time.


And now, time to put up the scaffold and get on with the rest of the job.

* * *

One of my biggest fans.

Thursday, June 26, 2014

Film at Eleven

My friend Nik, in a reference to the film Lawrence of Arabia, likes to call Pasadena "The Sun's Anvil." This is an apt description. I've lived in hotter areas around the Southland, but I've never lived in a place where the sun is more merciless. I've discussed at length the damage the sun has done to the south-facing elements of the Farm House exterior, but in the afternoon it's pretty hard on the west face as well. The sun coming through the front dormer windows will fade anything fadeable within its reach in record time.

For this reason, I have planned all along to install clear UV-blocking film to the front dormer windows when I finished them. I forgot this step when I did the north dormer sashes, but I remembered in time to have some on hand for the south sashes. Thus, after I varnished them, I turned my attention to the task of applying the film to the glass.

I approached this task with considerable trepidation, because I've heard reports for years that it is quite a difficult task, and I've seen my share of badly-done installations. Still, I had the film, and I had everything necessary to install it, so I figured I'd give it the old college try.

I unwrapped the package of film and found this:

(Please forgive those green horizontal bands; I forgot to turn off the overhead fluorescents.)

Great. Both the film and the backing were clear. How was I supposed to know which was which? More importantly, how was I supposed to separate one from the other?

Fortunately, the instructions provided the answers to these questions, in the form of a neat trick that's sure to come in handy in the future: simply apply a piece of tape on each side of the film-backing sandwich near a corner, leaving an inch or so trailing off the edge as a handle. Then, use the tape pieces as handles to pull the film and backing apart. The film is the side that has adhesive on the back of it, in case that isn't already apparent.


Before doing this, you have to cut the film to size. The instructions say to add an inch to both dimensions to provide a trim allowance. I did this for the first sash only, just to make sure I had the process down correctly before I did any more cutting.

The next step is to get the glass surface scrupulously clean, so that nothing comes between the film and glass to cause a visible bump or air bubble. After a thorough cleaning with Windex and Invisible Glass, I scraped the entire surface of the glass top-to-bottom and then side-to-side, using as lubrication a water-based surfactant spray that came with the installation kit.


I was surprised to discover how much junk came off of glass that had appeared perfectly clean. As per instructions, once I was done scraping I marshaled the junk and the remaining surfactant into one corner using the supplied squeegee, then removed it all from the glass using a lint-free cloth.


Now, I was ready to apply the film. The basic idea is to wet the glass uniformly with a thin layer of the surfactant in order to keep the adhesive from adhering to the glass while you position the film. Then, remove the backing from the cut piece of film, being extremely careful not to allow the exposed back of the film fold over on itself and get stuck together. 

Then, you place the film adhesive side down on the glass, slide it into position, then use the squeegee to remove the air bubbles and excess surfactant from under the film, starting in the middle and moving towards the edges, sopping up the excess surfactant periodically from the outside of the film.

The idea here is that once this step is done up to the edges, then you trim the excess film along the edges using the supplied trimmer. This trimmer leaves a 1/16" gap between the film and the edge to provide a route for the remaining air and surfactant to exit. Then, you finish the squeegeeing right up to the edges, then allow the film to sit undisturbed until the whole shebang dries.

Everything was going so incredibly well for me as I followed these instructions that I was positively ecstatic, until I got to the trimming part. I ran the trimmer down one edge, and it trimmed effortlessly right up until I got to the corner. It was at this point that I realized that I still had the overlap to cut through, and nothing to cut it against except for my freshly-varnished wood. Oops. The only thing I could do was pull the trimmed edge back up carefully, finish the cut with a pair of scissors, then squeegee it back down. This did not go extremely well, but it went well enough. Here's what I had at this point:

The side on the right of the picture is the one already trimmed.

Okay, I thought. Now I just have to come at this corner down the other side with the trimmer and it will be done. The thing is, I did, but it wasn't. The last eighth of an inch would not get cut, no matter what I did with that stupid trimmer. The film just refused to yield. I finally tossed the trimmer aside and used a utility knife blade, but instead of the film's cutting, it just tore. I probably should have used an X-Acto knife, but that simply did not occur to me in the heat of battle. I did a better job with the remaining corners, and miraculously, the finished sash turned out looking pretty good—if you didn't look too closely at the corners.


Still, it was obvious after that experience that these instructions were not written with this situation in mind. They would have worked with a car window or a modern aluminum-framed sash, but not with a wood sash, nor in fact with any situation where the glass is so deeply recessed on all sides.

Thus, for the remaining sashes I cut the film to as close as possible to the exact size before application. I cut it a bit too small in two of the three sashes, but I did cut all the pieces straight and true, so because the film is clear, you have to know what you're looking for to see the gap. In any event, with the sills back in place the film is as a practical matter invisible.


So, I would say that this job is not really terribly difficult after all, as long as you can take the sills out and put them flat to work on them. Installing them in place would not only be much more difficult, it would also be quite messy. Oh, and one other thing: That surfactant spray is nothing but water with a little detergent in it to lower its surface tension; one could easily make it with a few drops of liquid dish detergent (such as Joy or Dawn) in a quart of distilled water (you don't want any dissolved solids in it) put in a spray bottle. Many people also say that a credit card works just as well as that squeegee, but I think the squeegee provided in the installation kit makes for a faster job, simply because it is bigger and a bit more flexible.

I'll go back and install the film on the north dormer windows when workflow allows, but I'll have Wifey measure and cut the film. Because of her considerable skill at sewing, she can cut any pattern perfectly.

* * *

My faithful assistant, always there to lend a paw.


Wednesday, June 25, 2014

Doubleheader: Cleaning Finished Wood and Using The New Waterborne Varnishes

Wow, I just found out that the Wayback Machine has been archiving this blog periodically for three years. That's neato! It's good to know that we're being recorded in what is virtually the Official Record of the Intertubes for posterity.

* * *

With the sill work held up while I waited for the fresh WoodEpox to arrive from Abatron, I decided to go on to the refinishing of the sashes, since it was the only other thing I could do easily without the scaffold.

These sashes are the originals, and back when I did the functional rehabilitation I applied an oil-based pigmented stain to the interiors (this was before I had discovered the many virtues of water-based aniline dye stains). This kind of stain provides some protection from the elements even without a more resilient finish over it, and so I didn't have to worry about bleaching out water stains, as I did with the north dormer sashes. In fact, with the exception of some sun-fading and a certain amount of dirt and grime from the environment, the stained interiors looked as good as the day I stained them. A good cleaning and another coat of stain would restore them to varnish-ready condition.

To clean the sash interiors, I used the old Criblecoblis family recipe for wood cleaner: equal parts gum turpentine, boiled linseed oil and white vinegar. I've found that 1/4 cup of each, 3/4 cup total, is a good amount to work with; the mixture works best when it's fresh, and in any event it curdles after a while.

While I find this mixture to have quite a pleasant smell, redolent of the junk shops and antique stores along Honolulu Avenue that I haunted as a lad, it is also rather hard on the sinuses because of the vinegar, so I recommend opening the window when using this stuff.

Here's how to use it: apply to the surface to be cleaned with a paintbrush (I use an inexpensive "chip" brush), using enough to saturate the surface, and agitating the brush as necessary to make sure the cleaner gets in everywhere. Let the cleaner work for a few minutes, then remove it with a terrycloth towel (I use those inexpensive yellow microfiber towels sold at Costco), rubbing gently as necessary to help remove loosened dirt. Repeat as necessary until the surface is clean, then buff with a clean towel to leave an even, soft sheen.

Once the residual turpentine has evaporated from the towels, a hot-water laundering will leave them clean (if perhaps stained from the dirt) and ready to use again. Note that I do not recommend the use of paper towels for this work; the results are decidedly unsatisfactory.

I also don't recommend using this cleaner on unfinished wood; the wood will absorb the oil, changing its color and possibly inhibiting subsequent staining and finishing. To clean unfinished wood, I recommend naphtha or mineral spirits.

This cleaner is effective, but very gentle on finishes. Many cleaners make this claim, but some of them do so fraudulently. Don't ask me how I know. Much of our woodwork here bears the original finish, shellac over a dark pigmented stain. I used this cleaner on all the exposed woodwork in our bedroom as a trial back in 2006. You have to figure that 122-year-old shellac (at that time) would have to be a bit fragile, but the cleaner did not disturb it at all. It removed all the dirt, and left all the shellac.

Some time after I cleaned the exposed wood in the bedroom, I moved the dresser over and put another cabinet in next to it. This has given me a great opportunity to show you what this cleaner does. When I move that cabinet away from the wall, you can see both cleaned and uncleaned wood. After nothing but a dusting, here's a picture of that area:


You can still see clearly the line of demarcation. This not only shows you what this cleaner does, but it shows you that its effects have lasted here for nearly eight years. The sheen has faded, but the wood is still clean, and it still resists soiling.

The cleaned wood still obviously needs work to look good—and to that end, I have some tricks up my sleeve that I can't wait to show you—but the first step in any restoration is always cleaning, and the wood on the left is clean. It will have the same effect on a piece of furniture, with no wax buildup, no static attraction, and no having to do it every time you clean. A table cleaned with this mixture will only need dusting to stay looking clean and polished a long time, until the cat throws up on it or something. Don't ask me how I know.

This cleaner works on painted wood just as well, as long as the paint isn't flat or matte. I even used it on all the old rusty iron hardware, the hinges and the window locks. I brushed it on liberally, and wiped it off conservatively. It removed all the dirt and rust while lubricating the moving parts and leaving the patina. I'm telling you, this stuff is awesome. Just don't try it as a salad dressing. Don't ask me how I know.

One thing I need to add about this cleaner: volatile organic compounds (VOCs) have become increasingly criminalized here in southern California, and as a result most solvents have been reformulated so as to make them as ineffective as possible, so you have to use more of them, thus more VOCs, thus providing the pretext for even more onerous regulations. This includes turpentine. Probably, it will sooner or later include white vinegar as well.

At the same time, boiled linseed oil is no longer boiled; chemicals are added to raw linseed oil to achieve the same effect.

These changes have adversely affected my cleaner. It still works, but it's oilier than it used to be, it refuses to stay mixed for more than a minute, and it goes bad within days instead of weeks. I noticed these problems as I worked, but I didn't figure out the cause until afterwards.

I suspect a partial cure for these problems would involve decreasing the amount of "boiled" linseed oil relative to the other ingredients, say a 4:4:3 ratio, with the oil as the 3. I will experiment and report back, but for now if you use this cleaner, mix it in this new ratio, for example: 1/4 cup each of turpentine and white vinegar with 3 tablespoons boiled linseed oil. Season to taste, then add to salad and toss.

* * *

Despite the unexpected oiliness, the cleaner worked as well as ever on the sash interiors, and after applying another coat of the same stain and waiting several days to ensure that it was thoroughly dry, they were ready to be varnished. However, the fact that the stain was oil-based meant that I could not use the same oil-based varnish that I used on the north dormer sashes. This is because the solvents in the varnish will re-liquefy the stain, causing it to mix unevenly with the varnish, resulting in a mottled, unsightly appearance in the finished wood.

For this reason, I found it necessary to use one of the new waterborne varnishes on these sashes. In the past, a finisher would have used shellac (as did the original Farm House finisher) or lacquer. These, however, are decidedly inferior finishes for a sash, because of its proximity to the elements and the frequency with which a sash is handled and moved in its frame. In this situation, a waterborne varnish is just the thing to use.

The fact that these coatings are called waterborne varnishes, rather than water-based, reflects their utilization of a new, fundamentally different technology. Traditional coatings are held in suspension in a solvent carrier which evaporates, exposing the coating to oxygen which brings about a chemical change, or curing. I don't fully understand how these new coatings work, but as far as I do understand the matter, these are fully cured coatings that are subsequently pulverized and suspended, or borne, in a water-based carrier.

Somehow, when these coatings are applied and the water evaporates, the pulverized varnish cross-links, or re-amalgamates, into a resilient coating that looks and functions like a traditional oil-based resin varnish. It baffles science!  Well, actually, science is quite comfortable with it; it only baffles me.

Once I decided to use a waterborne varnish, I looked at all the available options, and selected General Finishes Enduro-Var Gloss, because by all accounts it is the most durable, water-resistant waterborne finish available, and as a plus, it adds an amber cast in emulation of oil-based varnishes.


While I am far from being a professional finisher, I have more than enough experience with varnishes that I am quite confident in my knowledge and abilities. Varnish is just about the most difficult non-specialty coating to apply well, but I've become pretty darn good at brushing out a nice, even coating with no brush marks. But nothing in my experience prepared me for what I saw when I opened up that can:


It looks vaguely disgusting, like that pink slime they add to ground beef. I was even more baffled by the stuff than ever: this is gloss varnish? Well, as I said above, this waterborne varnish is completely different from traditional coatings, so I really shouldn't have been at all surprised to find that it looks completely different.

Or, for that matter, that its application is also different. As a matter of fact, its application is incredibly easy. All you do is spread it out in as thick a coat as possible without runoff, and once you are done with a section, do not go back over it; as the instructions say, if you miss a spot you can get it next time without worry. Because the varnish is so thin, it self-levels magnificently, and because it dries so quickly, dust has almost no time to settle in it.

The result is an astoundingly flawless finish with very little effort and not a whole lot of time. While four coats of traditional varnish takes four days, four coats of this waterborne varnish takes less than a day and a half at a comfortable work pace, and in one long day if you're really in a hurry.


Not that I don't still have some skepticism regarding this new-fangled waterborne stuff. For one thing, while the lack of body in the coating out of the can makes its application so easy that anyone can get professional results, it also gives this varnish very little in the way of build characteristics. Put another way, while there are no irregularities to be seen in the finish itself, every tiny irregularity in the underlying wood is telegraphed right through. Four coats of the traditional oil-based varnish I use, when well applied, gives a surface that is much flatter, with a highly-desirable appearance of depth. A few more coats greatly enhance these properties.

Thus, while this varnish may have the expected resistance to moisture and solvents, and a nice amber cast to boot, still it looks more like lacquer than traditional varnish. This wouldn't be an issue in most situations, but in an old house, it is a bit of a disadvantage.

For another thing, I remain unconvinced that this waterborne varnish will stay looking this good for as long as a traditional oil-based varnish, especially the medium-oil phenolic-resin varnish I use. I suspect that it will not be as UV-resistant. More importantly, it definitely does not have nearly the same resistance to physical damage.

Don't ask me how I know.

* * *

"Why do they call that hunky guy 'Lassie'?"


Saturday, April 26, 2014

Meanwhile, Back in The Present Day

I hope you won't mind a brief intermission in the trip down Memory Lane to report on some actual work on the house.

I've finished the north front dormer!


I'm not ready for a Before And After yet, because I haven't moved the scaffold over to the south dormer. I'll do that a bit later.

There's not much more to tell about the north front dormer work that I haven't already; most of it was the type of work I've described previously: a little patching, a little caulking and a lot of painting. There were nonetheless a few matters that merit discussion.

The sashes in this dormer were all replaced during the course of the contractor's work. At that time, I primed the outside, but not the inside, and most notably not the bottoms of the lower sashes. This is because traditionally these are painted the inside color, and I was planning dye stain and varnish for the inside. The problem with this is that ever since then those lower sashes have been absorbing water every time it rained—not nearly enough to ruin them, but more than enough to cause water stains.


This would be no problem if I were painting the inside; I use a stain-blocking primer as a matter of course. But a dye stain would do very little to hide the water stains, even the dark stain I use. Thus, I had to bleach them.

There are several substances used to bleach stains out of wood, but for water stains, I've found that oxalic acid is best. This is because oxalic acid excels at removing iron-based stains, and most water stains are the result of iron in the water.

You will find oxalic acid crystals at a better hardware store, a paint store or a woodworking store, often sold as "wood bleach." Mixing instructions vary, but I strongly recommend the following method to prepare a solution.

First, let me caution you to use goggles and gloves when handling oxalic acid solution, and to add breathing protection when handling it in dry form (the crystals are highly irritating and become airborne easily). While it is not a terribly strong acid, oxalic acid is considerably stronger, and noticeably more irritating to skin and mucous membranes, than vinegar. Happily, it does not have an acrid smell, so you don't have to worry about breathing protection when handling it in solution.

To prepare a solution of oxalic acid, heat a quart of distilled water (the volume is not important, actually; a quart is simply a handy amount) to the temperature of very warm tap water, let's say 110-120 degrees. Then, using eye protection, breathing protection and gloves, slowly pour the oxalic acid crystals into the water, stirring well as you go. Make sure the crystals are dissolving fully as you go. When the crystals stop dissolving no matter how much you stir, you're done. You now have a saturated solution, which is in my experience the most useful concentration.

Put this solution in a stout glass or heat-resistant plastic jar with a tight-fitting lid, because when you're done bleaching your wood, you will find this solution very useful for getting rid of rust stains in concrete, porcelain, clothing, or for that matter anywhere else, and a little goes a long way. Mom always had a Mason jar of oxalic acid solution in the pantry for just this reason, and Grandma did too. It's really handy stuff.

While the solution is still hot, pour a small amount into a separate container, and using a cheap brush, brush the solution on the entire piece (or, as in my case, the entire area that is to be stained and varnished). If you don't do it all, you will have odd and quite distracting marbling effects which will look just as bad as the stains you are removing. Here's an example of this from the exterior side of one of the sashes:


The lighter, more brightly-toned wood farther away from the camera has been bleached. As you can see, this method of bleaching restores the wood's natural color without removing the natural color variations of the grain, and the difference between bleached and unbleached areas is quite noticeable.

Do this until all the wood is saturated, but no further; if the stains are not gone in a few minutes, you can brush some more on the remaining stains. You may want to take a soft toothbrush and gently scrub stubborn areas. Now, let everything dry out. You may see some oxalic acid crystals on the surface of the wood, but even if you don't, they're there, so put on your breathing protection again.

Now comes the messy part: you need to flush the surface of the wood three times with distilled water in order to get all the acid out. After that, you need to neutralize the remaining acid by rinsing with a solution of one tablespoon of baking soda in three quarts of water.

After letting that dry, then sanding thoroughly with very fine (180-grit) sandpaper, only a few vestiges of the stains remained:


I didn't imagine this would be a problem, so I moved on to the staining and varnishing. I covered these processes in detail back in the day, so I won't repeat myself here. I do want to mention one little detail about the stain nevertheless.

You may recall from the Journal that I'm using a water-based aniline dye for most everything, and with no clear idea of how much I would need, made up enough stain to varnish a battleship, because I didn't want to have to worry about matching it later:


Of that vat of stain, I used a little more than a quart to do the kitchen cabinets and casings. I then put the vat away in the vast recesses of the Farm House garage until my next stain job. That having arrived, I retrieved the vat and got my first good look at it in a while.


Well darn. It's five quarts low!

My previous worries about matching seemed silly now, but I knew that given the nature of this stain, if I could get it somewhere in the neighborhood of the original dilution, I could adjust it to match during the application process. I could see a faint shadow of where the water level was when the evaporation started, so I topped it up a bit past that mark with distilled water and mixed it well. As it turned out, it matched just fine without any fussing, and the finished sashes looked just as nice as the kitchen cabinets.


There was one problem, however. While the dye stain did indeed obscure the vestiges of the water stains, the structural damage from the water intrusion caused the wood in these areas to absorb the varnish considerably more thirstily than did the surrounding undamaged wood. I ended up having to apply an extra coat of varnish (four coats total, including the half-strength first coat), and even at that, I didn't get quite the film buildup I would have liked in these areas:


Fortunately, these flaws are not readily visible in ambient light (I took this picture in a way that maximized the visibility of the problem). Still, the next time the situation presents itself I'll have to figure out a way to correct for this.

With the sashes complete and re-installed, all that was left was the painting. The small areas involved called for the brush rather than the sprayer, but as I have mentioned, this new-fangled acrylic paint is so thick, and starts to dry so quickly, that it makes brushing with traditional water-base brushes extremely challenging.

Happily, brushmakers are finally catching up with the new trends in paint, and have begun to produce the kind of stiff, densely-packed polyester brushes this paint requires. I tried several different kinds, and found that the best for the new paints is the Proform Stiff. It had the best combination of stiffness and smoothness of application. With this brush, I was able to overcome many of the difficulties presented by the new paints. Nevertheless, I'd still rather be using a nice white China bristle with some good alkyd paint.

I've already started work on the south front dormer. I'm hoping I can get it done considerably more quickly than I did the north.

* * *

Thinking of absent friends.